Sampling Guides for Waste
Tab/Accordion Items
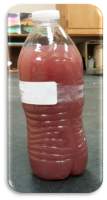
Liquid Samples
- Submit a representative sample in a one-pint clean, plastic (no glass) bottle. A water or soda bottle will work.
- Leave 2" of headspace in the bottle to allow for sample expansion.
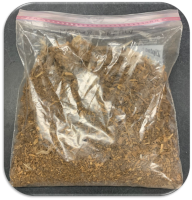
Solid Samples
- Collect solid samples by subsampling from 10 locations within the pile. Mix subsamples together to make composite sample.
- Submit about 1 quart of the composite sample in a clean, sealable plastic bag.
Litter should be stored over an impervious surface and covered. Uncovered waste develops a weathered exterior that will not accurately represent the majority of the material because rainfall moves water-soluble nutrients through the pile. If the litter is unprotected and used over an extended period, take new samples before each application.
- Collect 10 to 12 subsamples to a depth of at least 18 inches using a shovel or pipe.
- Combine all subsamples in a plastic container, and mix thoroughly. Submit 1 quart of this mixture in a clean, sealable plastic bag.
- Sample each poultry house separately. The concentration of nutrients in poultry litter varies widely—both from house to house and within each house.
- Collect waste cores or slices from 10 to 12 locations in each house using a shovel or pipe. Cores or slices should extend from the top to the bottom of the accumulated waste. Take samples around waterers, feeders and brooders in proportion to the space these areas occupy in the house.
- Combine all subsamples in a plastic bucket.
- Submit 1 pint of sample in a sealable, plastic bag.
- Collect 10 to 12 subsamples to a depth of at least 18 inches using a shovel or pipe. Avoid edges of the pile.
- Combine all subsamples in a plastic container, and mix thoroughly. Submit 1 quart of this mixture in a clean, sealable plastic bag.
- Premix the slurry in a pit or storage basin prior to sampling.
- Collect subsamples from 10 to 12 areas of the pit and from different depths. An 8- to 10-foot section of 1/2- to 3/4-inch PVC pipe can be used to collect samples. Insert the pipe into the pit, and press a thumb over the end to create an air lock. Remove the pipe from the pit/basin, place it over the sampling container and release the air lock. Do not rinse the sample into the container because this will dilute the results. However, if you plan to add water to the waste prior to application, then adding the proportionate amount of water to the sample is appropriate.
- Mix the subsamples thoroughly in a plastic bucket and submit sample in a 12 oz plastic container with 1-2 inches of head space.
- If the lagoon is a two-stage system, draw samples from the lagoon that will be pumped. Do not include floating debris and scum in the samples.
- Collect subsamples from 10 to 12 locations in the lagoon. A 10-foot rod with a 1-pint container attached to the end serves as a good sampling device.
- Collect samples at least 6 feet from the edge of the lagoon to a depth of about 1 foot. Shallower samples from an anaerobic lagoon are not acceptable because oxygen transfer near the surface can alter the chemistry of the solution.
- After collecting subsamples, mix them thoroughly in a plastic container (such as a bucket) and submit sample in a 12 oz plastic container with 1-2 inches of head space.
- Collect 10 to 12 subsamples to a depth of at least 18 inches using a shovel or pipe.
- Combine all subsamples in a plastic container, and mix thoroughly. Submit 1 quart of this mixture in a clean, sealable plastic bag.
Important: Nutrient concentrations change over time. Waste samples should be collected and submitted as close to the time of application as possible. Analytical results from previous years have minimal value.
- Sample containers are not provided by NCDA&CS.
- Keep samples cool. If they are stored for more than one day, they should be refrigerated.
On This Page Jump Links
Off
This page was last modified on 04/20/2026